Code Your Own Zero Knowledge Proofs with Risc0
Tutorial showcasing the implementation of zk project using Risc0 and Rust language


Introduction:
Zero-knowledge proofs enable private, secure transactions. With zkSNARKs and zkSTARKs, a prover can prove possession of some information to a verifier without revealing the actual data. This has huge potential for anonymity and confidentiality. But zkSTARKs and zkSNARKs are complex. Risc0 makes them more accessible. Let’s see it’s very basic implementation:
This tutorial will cover:
Installation of Risc0
Writing your first zero-knowledge proof program using rust
Prerequisites:
Copy pasting shortcuts
Installations required:
Rust language
Cargo crate
Some basic coding knowledge in rust
Code Editor (VSCODE if possible)
By the end, you'll have practical experience with zero-knowledge proofs in Risc0. No advanced math or cryptography background is required.
We'll focus on the coding essentials to start building real-world solutions. This hands-on introduction aims to make powerful privacy tech understandable for any developer.
Installation:
(For MacOS) To install rust and cargo, you can run the below command in the terminal:
curl [<https://sh.rustup.rs>](<https://sh.rustup.rs/>)-sSf | shTo install Risc0, you run the below command after installation of rust and restart the terminal:
cargo install cargo-risczeroFor the above commands to build successfully you will need to have installed the required dependencies.
brew install opensslbrew install pkgconfNext, we'll need to install the
risc0toolchain with:cargo risczero install
That’s all we need. So, let’s head to the code editor.
Writing some magical lines:
Now that we are done with the installation you can read and follow these abra ka Debra 🪄 steps:
Open the code editor and head to the location where you want to create your project in the editor's terminal.
Create a new instance of a project using the below command in the terminal:
cargo risczero new multiply.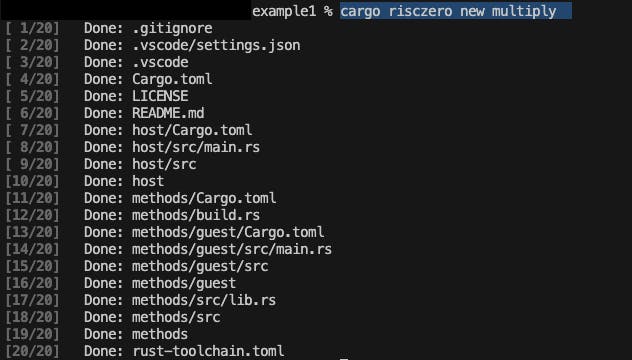
You should be seeing a folder created called multiply. cd into it.
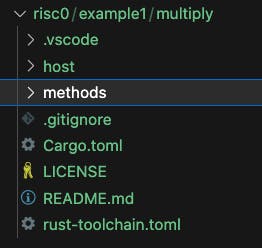
cd multiplyThe folder structure is very simple.
We have a host folder and a methods folder.
The host folder contains the host program which we call the guest program. It also can verify if you want.
The methods folder contains the guest program which contains the portion of the zkvm application that gets proven. It receives the input params from the host, then based on the logic it generates results and commits them to the journal and sends them to the host as a receipt.
The rest of the files will be explained on the go as required.
Let's start with the guest program
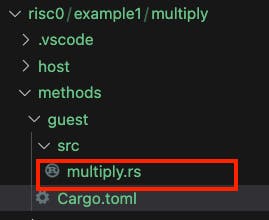
Let’s change the name of the files
main.rs—>multiply.rs.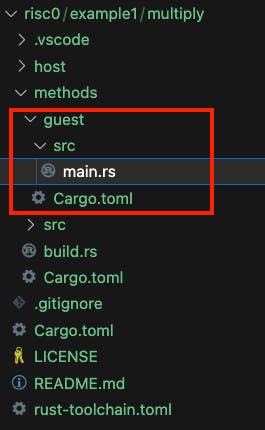
Create a folder named
binin thesrcfolder and movemutiply.rsto it. Your folder structure should look something like this: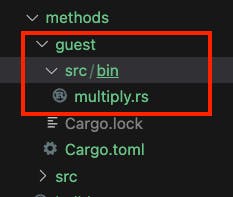
Open
Cargo.tomland change the update thename = "method_name” —> name = "multiply”.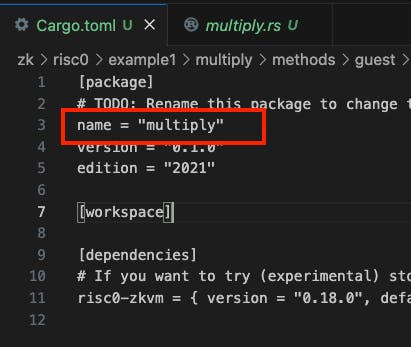
Add the below code in
Cargo.toml.[[bin]] name = "multiply" path = "src/bin/multiply.rs"So your final
Cargo.tomlwill look like this: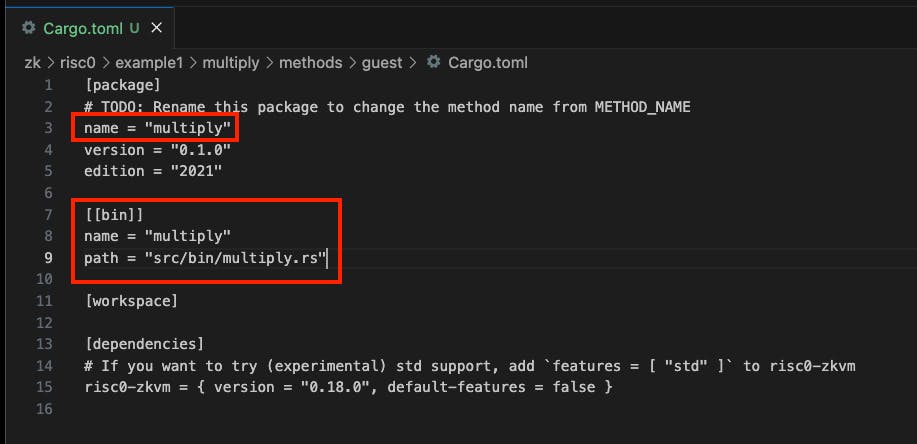
Now open
multiply.rs. Here will will edit the main function. This is the function that will be executed in zkvm.In the below code we are taking the input from the host program. Then we make sure that the input is not trivial factors that is 1. Then calculate the product and finally commit it back to the host of the program.
     // We will get the values for these variables from host program
     let a:u64 = env::read();
     let b:u64 = env::read();

     // To avoid trivial factors like multiplication by 1
     if a == 1 || b == 1 {
         panic!("Trivial factors !!")  // The panic! macro in Rust is used to intentionally crash a program when an unrecoverable error occurs
     }

     // Caculate the product of the two numbers
     let product = a.checked_mul(b).expect("Integer Overflow");

     // Commit back the output to the host to save it as receipt
     env::commit(&product);
After the above changes, your
multiply.rsshould look like this.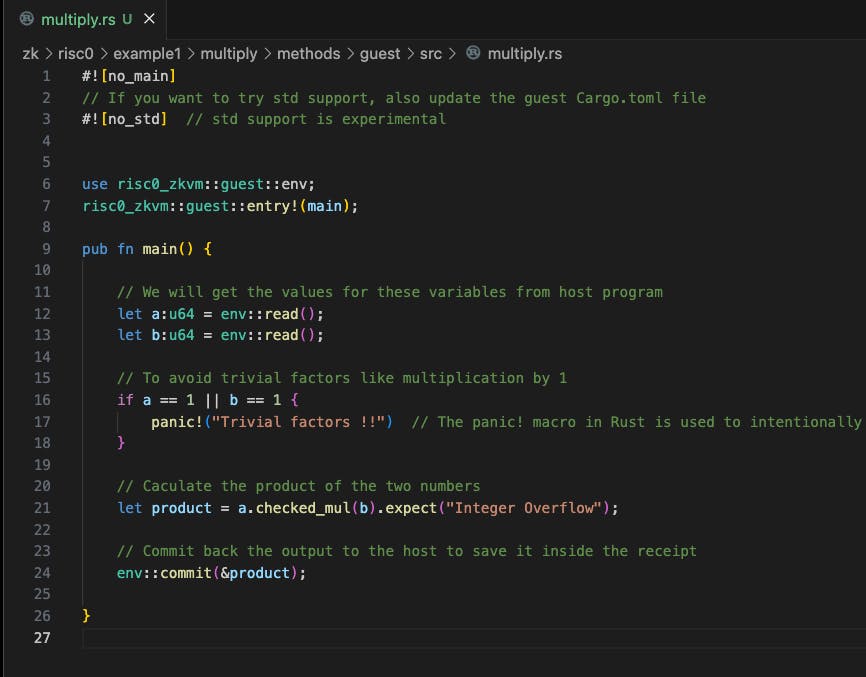
There is one more final change in the
Cargo.tomlofmethodsfolder.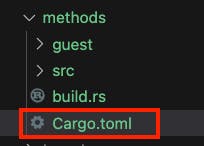
Open and update the value of
name = "multiply-methods”.Your final
Cargo.tomlwill look like below.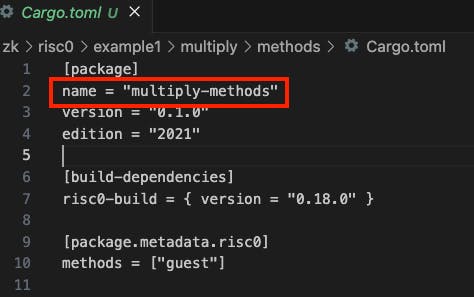
Our work here is done.
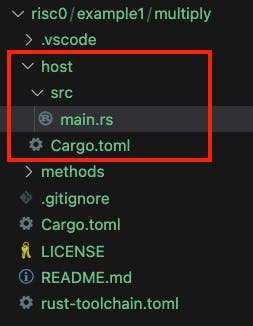
Now let’s go to the host program.
Your host folder must be looking like this now.
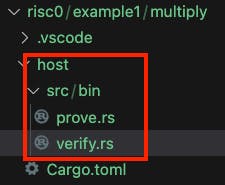
We want to split the
main.rsinto two files that areprover.rsandverify.rs.Create a new folder under
srcand name itbin.Remove
main.rs. Create files and name them asverify.rs&prove.rs.Your folder structure should look something like this now.
Open
prove.rsand let’s start coding:Add the below code. These are the imports that we will require.
 use multiply_methods::MULTIPLY_ELF; // It is a binary file of multiply_method
 use risc0_zkvm::{
     default_prover,
     serde::{from_slice, to_vec},
     ExecutorEnv,
   };
Let’s make changes to the
mainfunction.fn main() { // Declaring our secret input params let a: u64 = 17; let b: u64 = 23; // First, we construct an executor environment let env = ExecutorEnv::builder() .add_input(&to_vec(&a).unwrap()) // Passing the input params to environment so it can be used by gues proggram .add_input(&to_vec(&b).unwrap()) .build() .unwrap(); // Obtain the default prover. let prover = default_prover(); // Produce a receipt by proving the specified ELF binary. let receipt = prover.prove_elf(env, MULTIPLY_ELF).unwrap(); // Extract journal of receipt (i.e. output c, where c = a * b) let c: u64 = from_slice(&receipt.journal).unwrap(); // Print an assertion println!("Hello, world! I know the factors of {}, and I can prove it!", c); // Let's serialize the receipt so we can save it to an file for verifier program to verify. let serialized = bincode::serialize(&receipt).unwrap(); // Writing the serialized contect to receipt.bin file let _saved_file = match std::fs::write("./receipt.bin", serialized){ Ok(()) => println!("Receipt saved and serialized as receipt.bin"), Err(_) => println!("Something went wrong !!"), }; }Your final
prove.rsshould look like this.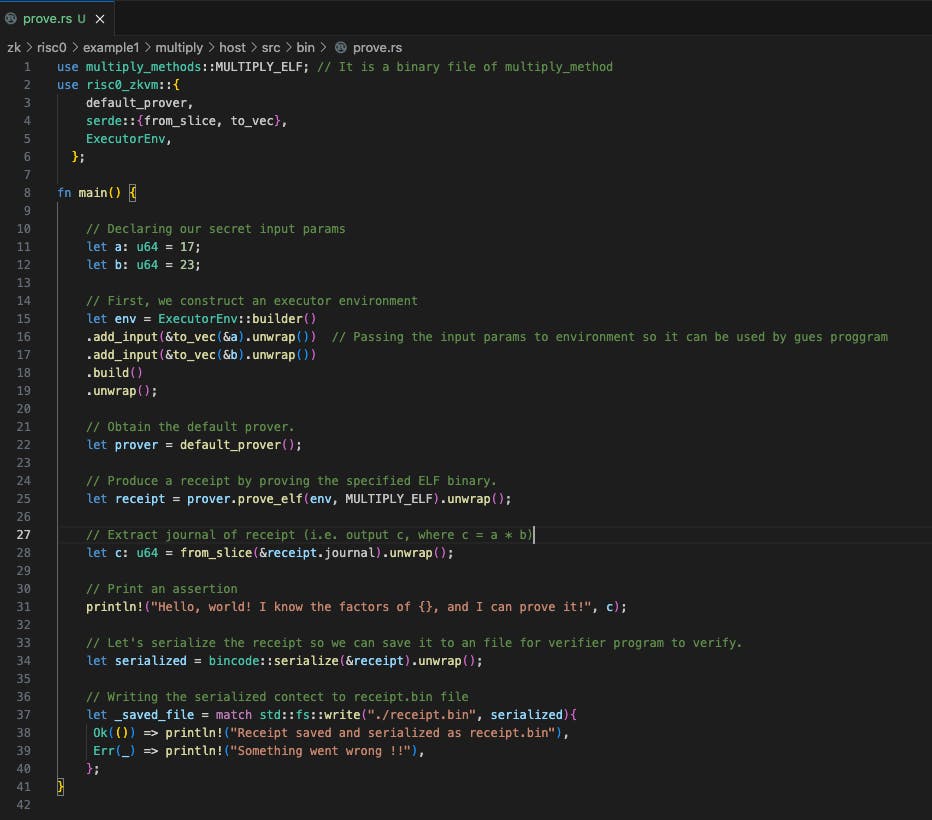
Let’s open and add code to our
verify.rs.Here we will import the guest program image ID and some basic imports.
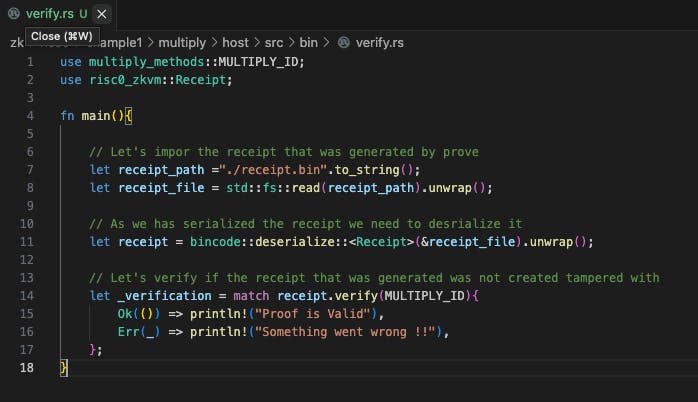
use multiply_methods::MULTIPLY_ID;
use risc0_zkvm::Receipt;
Let’s make changes to the main function.
fn main(){
    // Let's impor the receipt that was generated by prove
    let receipt_path ="./receipt.bin".to_string();
    let receipt_file = std::fs::read(receipt_path).unwrap();

    // As we has serialized the receipt we need to desrialize it
    let receipt = bincode::deserialize::<Receipt>(&receipt_file).unwrap();

      // Let's verify if the receipt that was generated was not created tampered with
    let _verification = match receipt.verify(MULTIPLY_ID){
        Ok(()) => println!("Proof is Valid"),
        Err(_) => println!("Something went wrong !!"),
    };
}
Your final verify.rs should look something like this.
I promise these final changes now we are almost done.
Open the
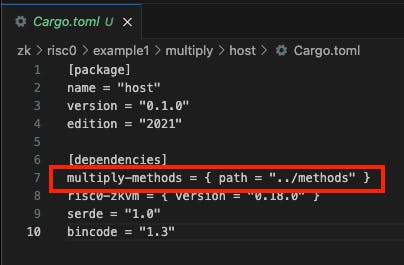
Cargo.tomlin thehostfolder and make the below changes under dependencies.
multiply-methods = { path = "../methods" }Your Cargo.toml will look like this.
It’s finally time to see if our code works.
Fire up your console in the root directory of the project, run the below command in
console cargo run --release --bin proveThis command will generate the proof and receipt for the verifier.
<aside> 💡 When running the first time it will take a lot of time. So don’t worry grab a coffee until it completes.
</aside>

Once this is done. If you want, you can verify the receipt that you have generated. For that run this command
cargo run --release --bin verify<aside> 💡 When running the first time it will take a lot of time. So don’t worry grab a coffee until it completes.
</aside>
